Pumpkin Cake Pops are a fun fall twist on regular cake pops. They look like tiny pumpkins and taste amazing, making them perfect for Halloween parties, Thanksgiving, or autumn snacking.
These treats are super easy to make. Using Oreos and cream cheese for the base, you can create cute pumpkin-shaped pops that everyone will love. They're a great way to enjoy the flavors of fall in just a bite or two.

Want to Save This Recipe?
Enter your email below, and we'll send it directly to you. Plus, you'll get amazing recipes sent to you daily.
By submitting this form, you consent to receive emails from Recipes Simple.
I love making these Pumpkin Cake Pops every fall. They're always a hit at Halloween parties, and kids get excited to help decorate them. What's great is that they're not just cute - they're really tasty, too!
Making these with the whole family is tons of fun. You handle the mixing and shaping, then let the kids dip the pops in the orange coating and add the little green stems. It's a bit messy, but that's part of the fun!
These Pumpkin Oreo Cake Pops have just five ingredients. They are filled with a rich, dark Oreo center and coated in a delicious candy coating. They're easier to transport than a whole cake, and people love the individual servings. Plus, they always look impressive, even though they're not hard to make.
Ingredient Notes
See printable recipe card below for all ingredients, specific measurements, and complete instructions.

- Oreos - Use regular Oreos, not double stuffed. The family-size package works best for this recipe.
- Cream Cheese - Make sure it's softened to room temperature for easier mixing. Full-fat cream cheese works best for flavor and texture.
- Orange Candy Melts - These give the pops their pumpkin color. You can find them at most craft stores or online.
- Butterscotch Chips - These make great pumpkin stems. If you can't find butterscotch chips, regular chocolate chips work too.
- Green Icing - A tube of pre-made green icing is easiest, but you can also make your own with powdered sugar, milk, and green food coloring.
How To Make Pumpkin Cake Pops


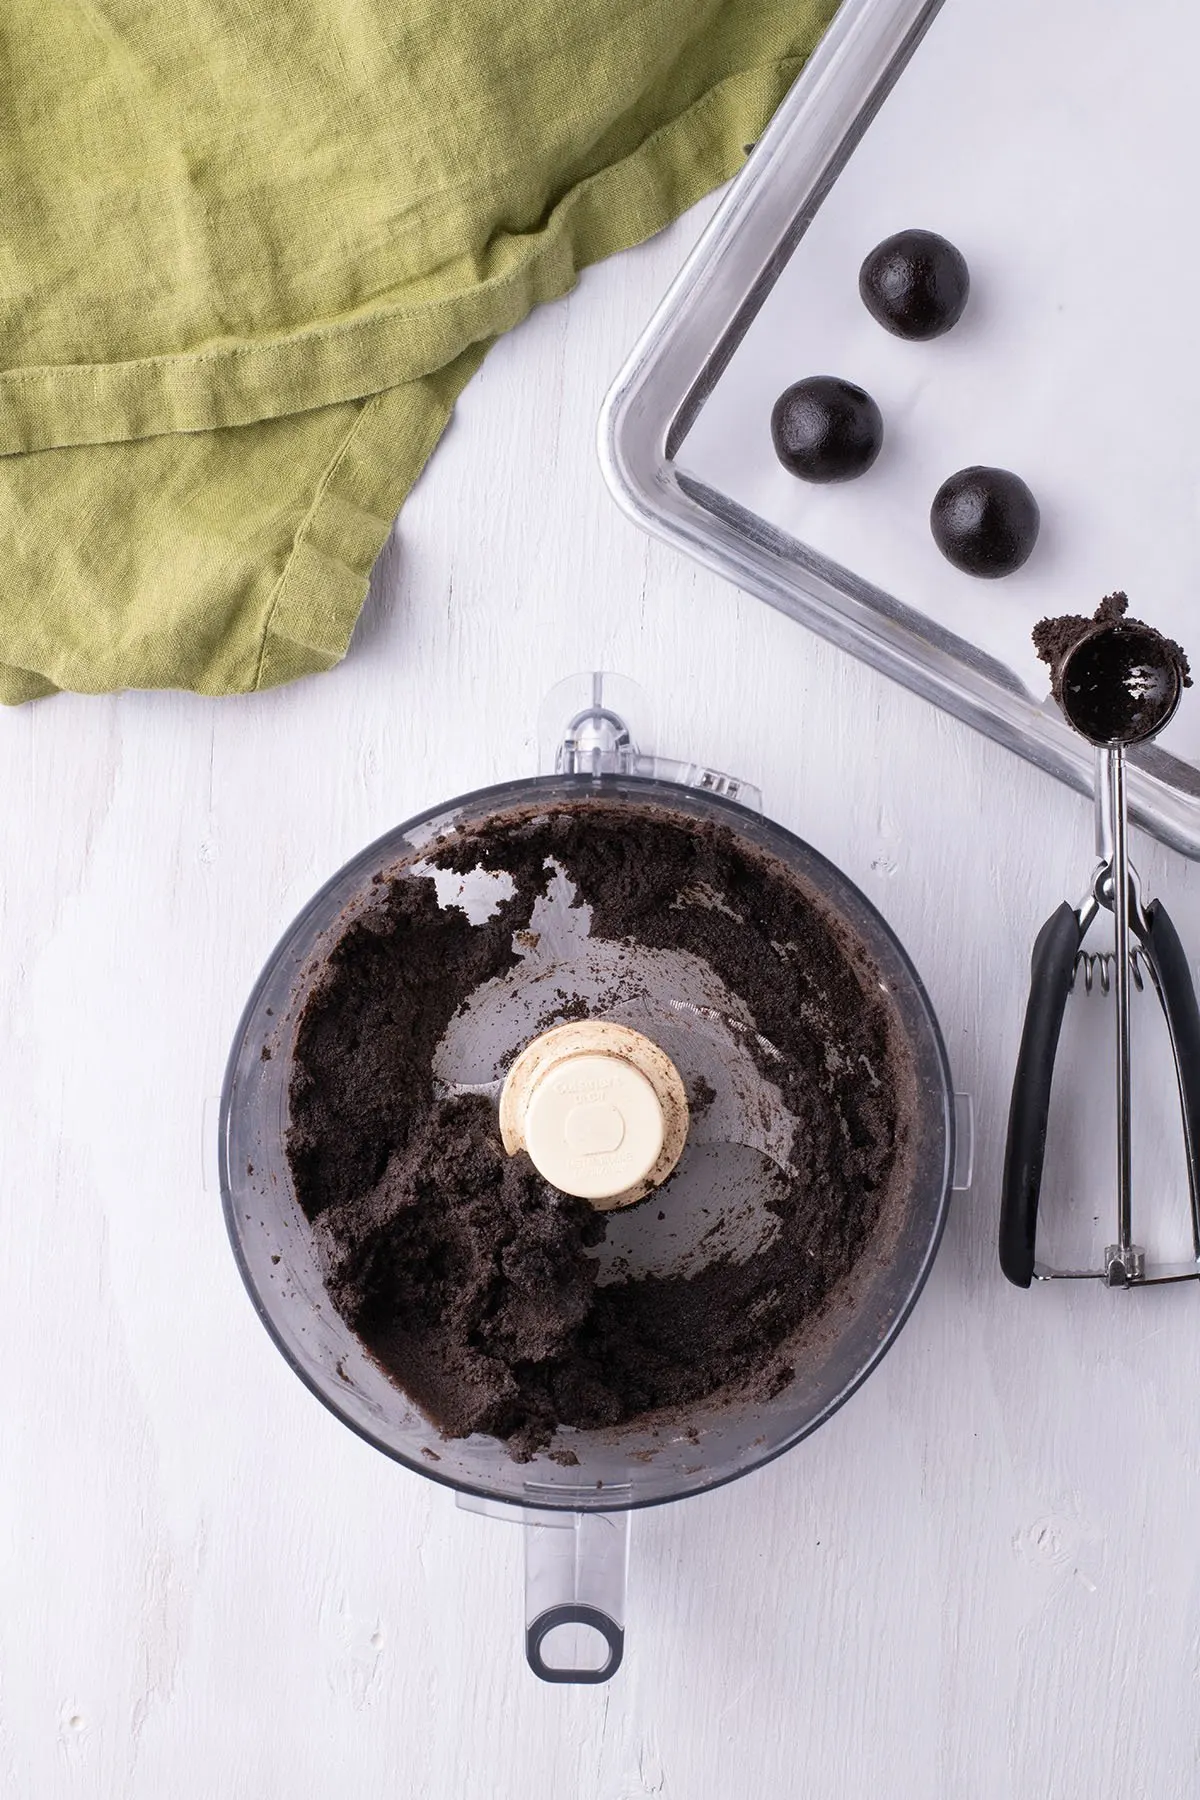
Let's start by making our cake pop mixture. Grab your food processor and pulse those Oreos for about 2 minutes or until you have fine crumbs.
Next, add in your softened cream cheese. Keep blending until everything's smooth and there aren't any chunks left.


To shape the cake pops, use a 1 tablespoon-sized cookie scoop to make 36 rounded balls. If you don't have a scoop, no worries - just use a spoon and your hands. Place these on a parchment-lined tray as you go.
Time for a quick chill! Pop that tray in the fridge for about 25 minutes. This firms up the balls and makes them easier to work with later.
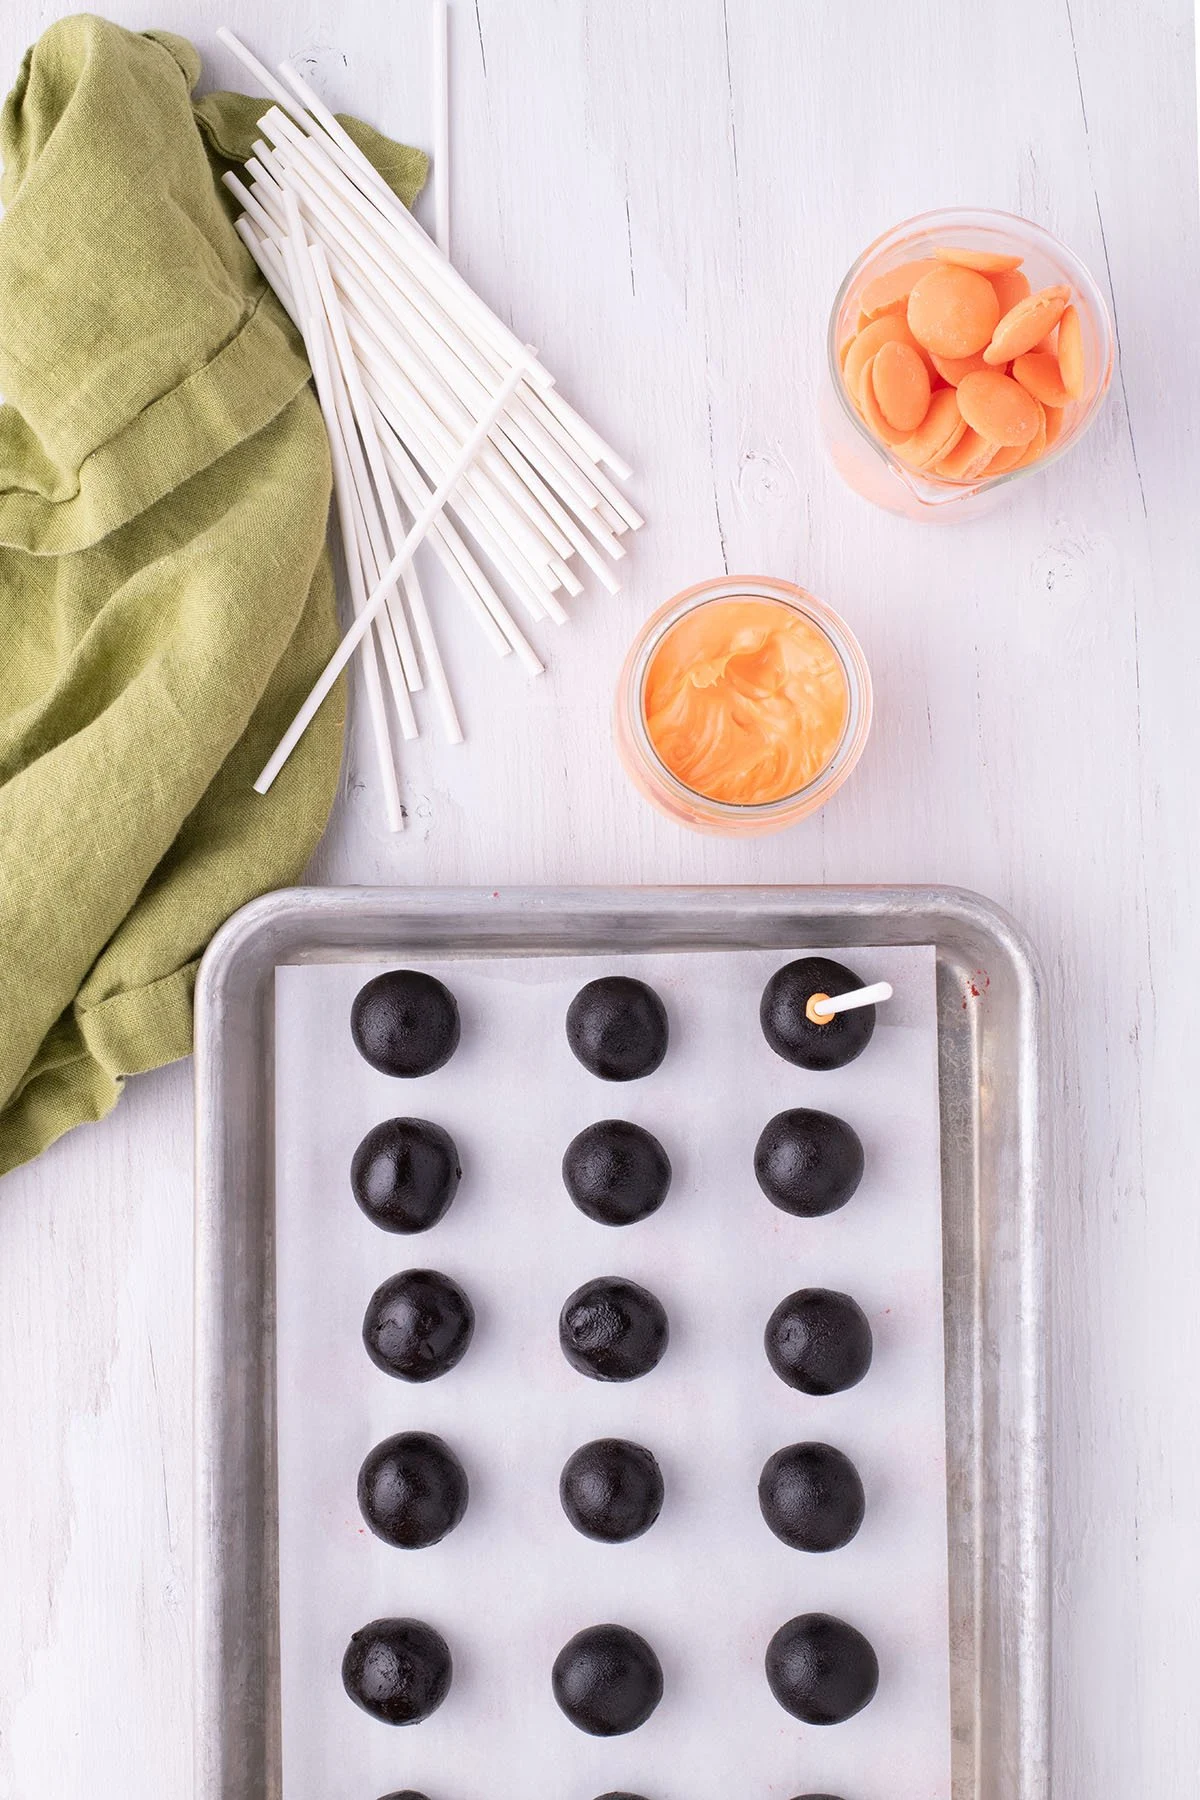
While those are chilling, let's prep our coating. Melt your orange candy melts according to the package directions. A microwave usually works great for this. Stir until it's smooth - we want a nice, dippable consistency.
Once your cake balls are firm, it's time to add the sticks. Dip the end of a lollipop stick into the melted candy, then push it into one end of a cake ball. Do this for all your pops, then give them another quick 5-minute chill in the fridge.

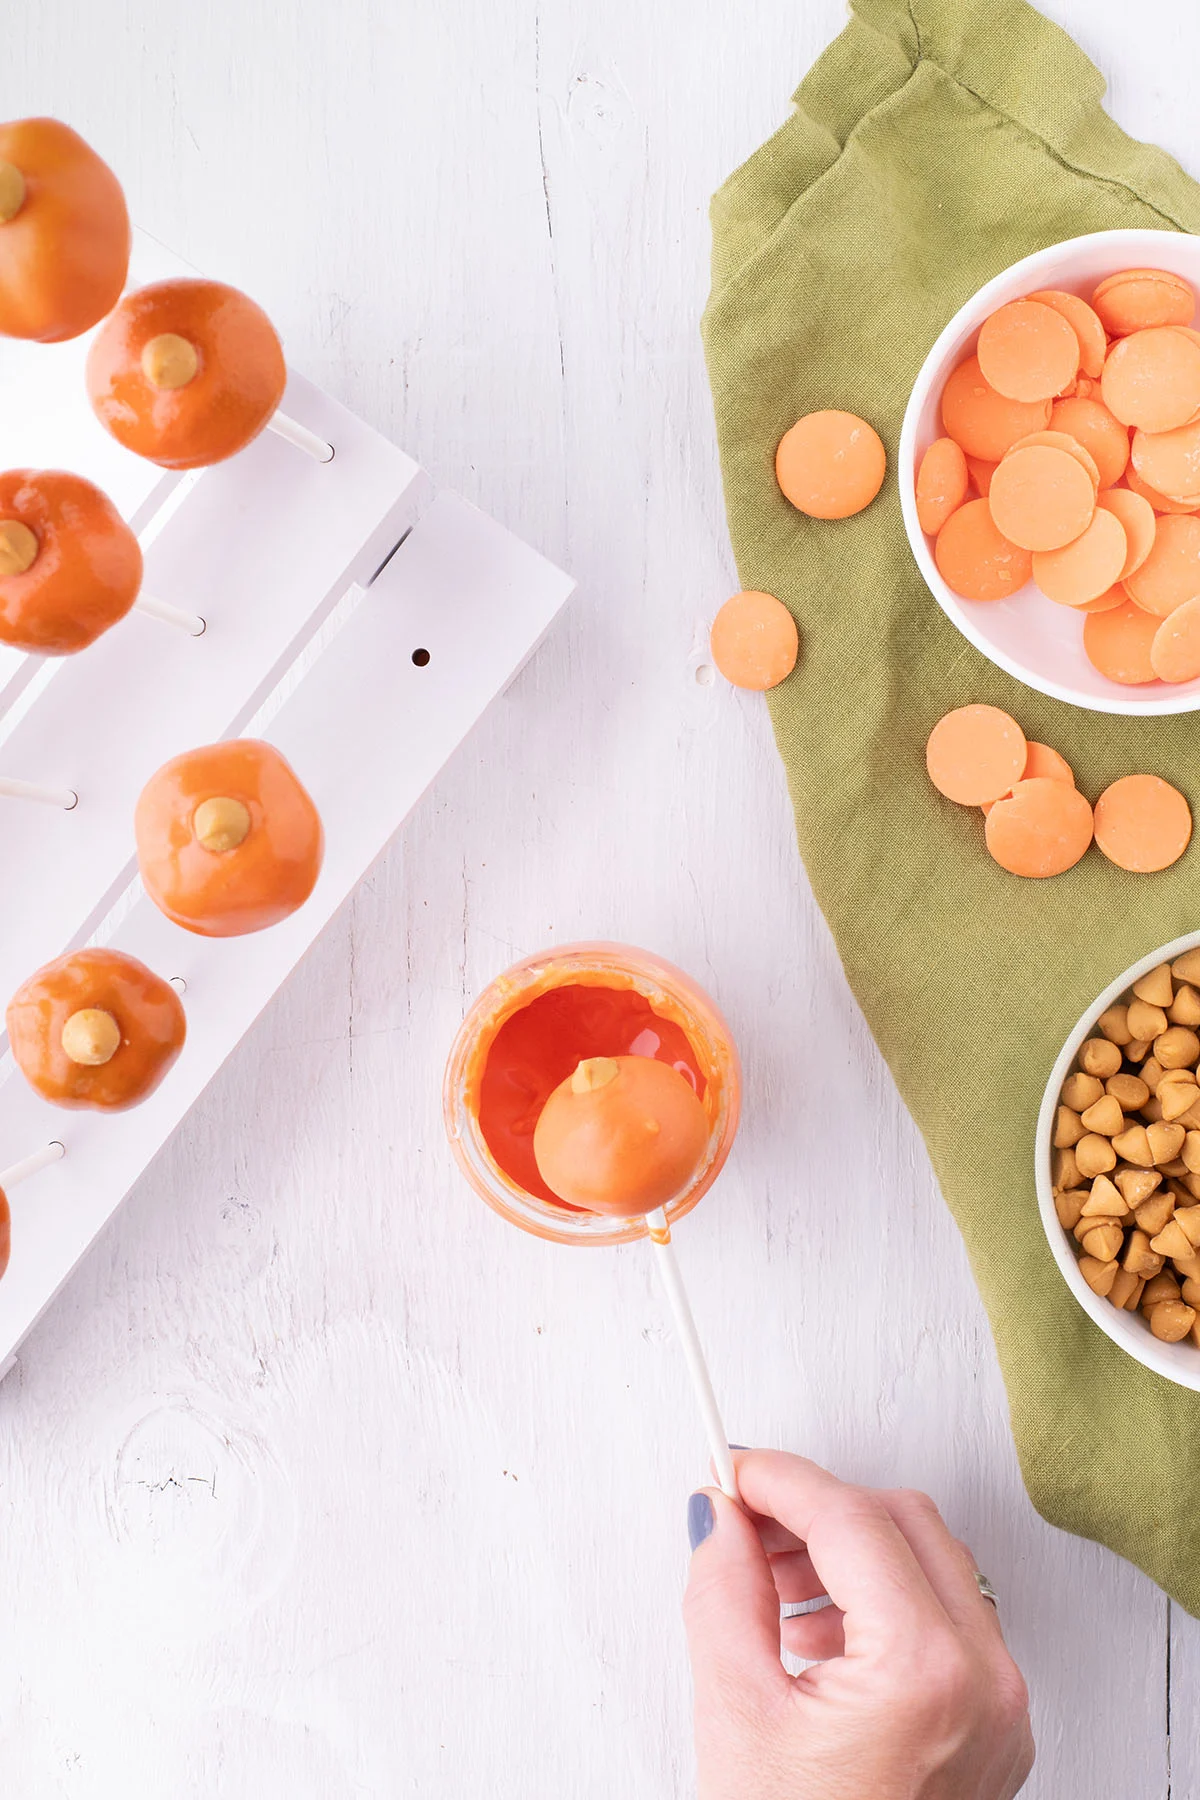
Now for the messy (but fun) part - coating our pops! Dip each pop into the melted candy, giving it a little twirl to let the excess drip off. While the coating is still wet, stick a butterscotch chip on top for the stem.
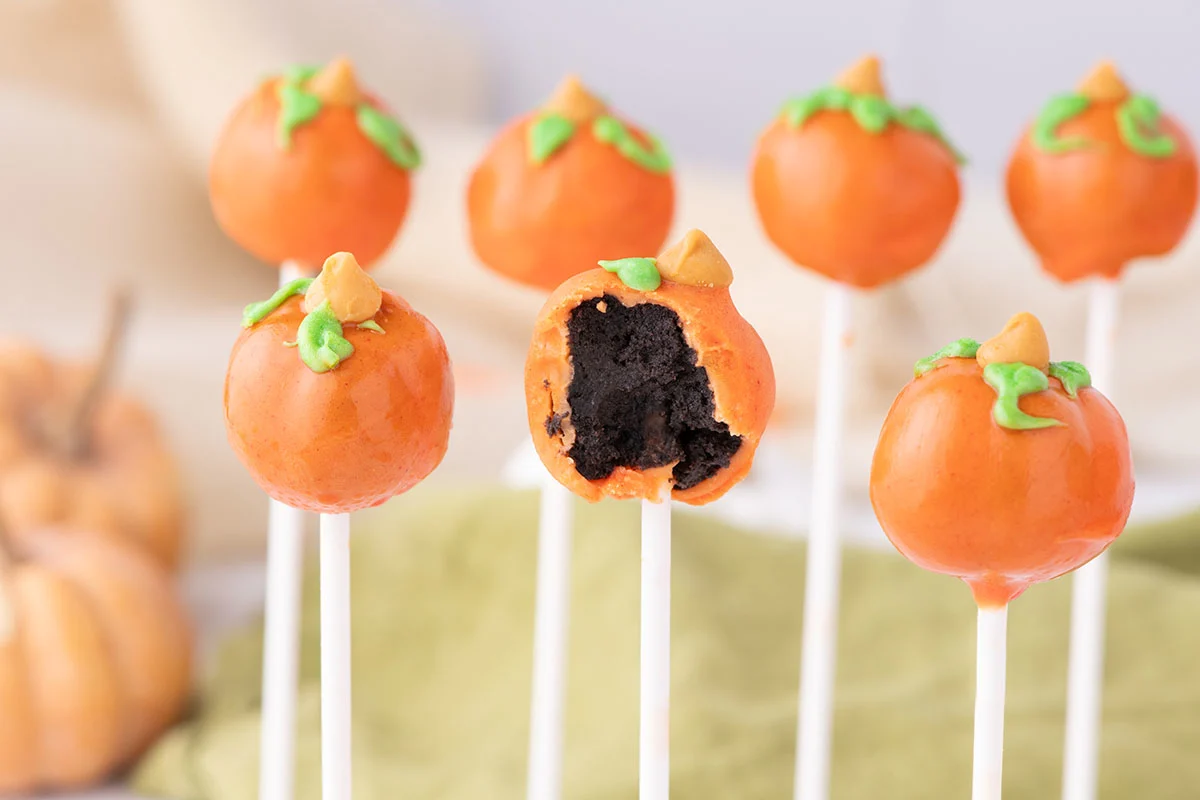
Let's add some finishing touches. Use your green icing to pipe on some leaves and vines. Get creative here - every pumpkin is unique!
Finally, stick your finished pops into a Styrofoam block to let them set completely.

Variations
- Make pumpkin spice cake pops. Use vanilla Oreos instead of chocolate ones, and add 1/2 teaspoon of pumpkin pie spice to the mixture for a more traditional pumpkin flavor.
- Give them a cinnamon kick. Mix 1/4 teaspoon of ground cinnamon into your Oreo and cream cheese mixture for a warm, spicy note.
- Add faces. Use black icing to draw jack-o'-lantern faces on your pops for a Halloween party.
Make-Ahead, Storing, and Freezing
Make Ahead: Pumpkin Cake Pops are perfect for making in advance. You can prepare the cake balls and refrigerate them for up to 2 days before coating. Keep them covered in the refrigerator. When you're ready to finish, let them sit at room temperature for about 15 minutes before dipping in the candy coating.
Store: Keep your finished Pumpkin Cake Pops in an airtight container in the refrigerator. They'll stay fresh for up to 4 days. For best results, place a piece of parchment paper between layers to prevent sticking. Before serving, let them sit at room temperature for about 10 minutes to soften slightly.
Freeze: These cake pops freeze well. To freeze, place the fully decorated pops on a baking sheet and freeze until solid, about 1 hour. Then transfer them to a freezer-safe container or zip-top bag. They'll keep for up to 1 month. When you're ready to enjoy, thaw them in the refrigerator overnight. Let them come to room temperature for about 15 minutes before serving for the best taste and texture.
My cake pops are falling off the sticks when I dip them. What am I doing wrong?
This usually happens when the cake balls are too warm. Make sure to chill them thoroughly before dipping.
The candy coating is too thick. How can I thin it out?
If your coating is too thick, try adding a teaspoon of vegetable oil at a time and stirring until you reach the desired consistency. Be careful not to add too much, or the coating might not set properly.
My pops don't look perfectly round. Does this matter?
Not at all! Slightly imperfect shapes can make your pops look more like real pumpkins. As long as they taste good, that's what matters most.
Recipe Tips
- Make sure your cream cheese is fully softened before mixing. This helps create a smooth, lump-free cake pop base.
- When crushing the Oreos, make sure to get them to a fine, even consistency. This helps the cake balls hold together better.
- If the candy coating starts to harden while you're working, microwave it in 15-second intervals, stirring between each, until it's fluid again.
- Work quickly when adding the butterscotch chip "stem" and piping the leaves. The candy coating sets fast!

For more fun Halloween treats, check out my Frankenstein Cupcakes, Spider Donuts and Chocolate Spider Web Halloween Bark.
These Pumpkin Cake Pops are cute, festive, and so much fun to make! They're perfect for adding a bit of fall cheer to any dessert table or Halloween party.

Pumpkin Cake Pops Recipe
Ingredients
- 18.2 ounce package Oreos (family size)
- 6 ounces Cream Cheese, softened
- 24 ounces Orange Candy Melts
- 11 ounce bag of Butterscotch Chips
- Green Icing tube
Instructions
- Pulse the Oreo cookies in a food processor for 2 minutes until they resemble a fine crumb.
- Add cream cheese and continue blending until the mixture is smooth and free of any chunks.
- Using a one tablespoon-sized cookie scoop, make 36 rounded balls and place them on a parchment-lined tray.
- Chill cake balls for 25 minutes or until firm.
- In a microwave-safe container, melt candy melts as per package directions, and stir until the mixture is smooth.
- Insert the end of the stick into the melted candy and then insert it into one end of the cake ball. Allow to chill for 5 minutes in the fridge.
- Once the stick has hardened around the cake ball, dunk the cake pop into the melted candy and rotate it to let any excess candy drip off.
- While the candy coating is still soft, add a butterscotch chip on the top for a stem.
- Apply the green icing to make leaves and vines.
- Once the cake pop coating has set, place the cake pops into a Styrofoam block to serve.

